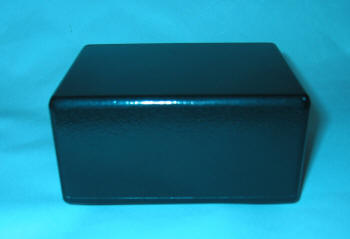
Several years ago, I borrowed an Air Tight ATH-1 moving coil step up transformer and it changed my life. Well, maybe it was not a life-altering experience, but in audio terms, the audition was significant. The Air Tight sounded exceptional, adding a noticeable amount of richness and depth of tone. It also seemed to provide a better load for the moving coil cartridge. As I noted in an earlier review, (the step-up) “provided gain with no added noise, distortion, or artifacts. …there was a small but noticeable improvement in the sound of moving coil cartridges. An added sense of ease was obvious, making the presentation just a bit more tangible and believable. And it makes sense: the coils in the cartridge feeding the coils of the transformers which results in a closed circuit of just wire. Very Zen.”

The Air Tight unit had long since departed, and I wanted to have on hand an outboard step-up to help with reviews. This is the result. I had used the Jensen -347 transformer twice before with excellent results, but budget issues intruded on this project. I do not feel that sound quality suffered much using the lower cost – $105 each – JT-44K-DX transformers instead of the $250 -347 model.
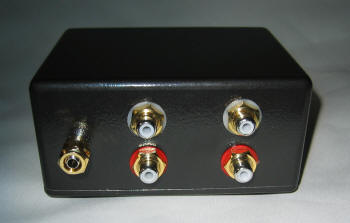
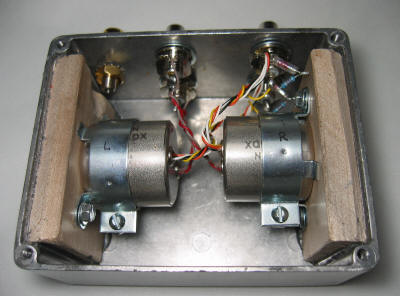
I mounted the transformer brackets on 1/2″ thick solid unfinished maple wood. The wood was bonded to the aluminum enclosure using J-B Weld adhesive. All rear panel connectors are Cardas. No lettering is required because the inputs are closest to the ground post and the outputs are farther away. Clean and simple.

Due to the close proximity of the Cardas connectors to each other, I did not feel that common-point star-grounding would provide a significant benefit. There is one resistor and one capacitor, provided by Jensen, across each transformer secondary for correct loading. No changes are needed for cartridges with coil DC resistances up to 45 ohms, which is the majority of cartridges on the market today. It is designed to work properly into a standard 47k Ohm load provided by any phono preamplifier.
Construction order:
1. Drill holes in enclosure
2. Cut and mount maple, with transformer brackets attached.
3. Paint enclosure and allow to dry thoroughly
4. Stick on feet on removable “lid”.
5. Mount RCA jacks and ground post.
6. Install transformers.
7. Solder connections.
8. Enjoy (most important step)

One of the things I might change if I made another one would be to use a wider enclosure. As you can see in the image, the fit of both transformers is a bit tight. It works just fine, but the installation was a bit tricky. It might also be worthwhile to use a deeper enclosure (or mount the transformers farther from the rear connections) to prevent the whole thing tipping backwards when using heavy cables.
The total cost was under $300. If this was a commercial product, it would probably sell for about $1500 (5x parts cost). Highly recommended, especially if you use a passive preamplifier and need more gain from your analog front-end, or have a preamplifier that is noisy at the volume control setting you use for LP listening.
Parts list:
Jensen JT-44K-DX transformers, wired for 20dB gain, Qty 2, $105 each; Source: Jensen Transformers (This site has very complete specs and wiring suggestions, in PDF format.)
Cardas GRFA short RCA jacks with thin nuts, Qty 4, $12.75 each; Source: Sonic Craft
Cardas GRND, Qty 1, $12.00 each; Source: Sonic Craft
Maple, 1/2″ x 3″ x 24″ (smallest length available), Qty 1, ~$4; Source: Lowes Hardware
J-B Weld “Cold Weld” Adhesive, pn 8265-S, Qty 1, ~$4; Source: Lowes Hardware
Paint: Rust-oleum Hammered Finish spray paint, Black #7215; Source: Lowes Hardware
Enclosure: Deltron pn 459-0030 Diecast aluminum, 4.5″ x 3.5″ x 2″, Qty 1, $10.49, Mouser part number 400-4592; Source: Mouser Electronics
Rubber feet: Qty 4, $0.30 each, Mouser part number 563-F-3581; Source: Mouser Electronics
